
In celebration of the 250th birthday of the greatest country on earth, I’m going all in on the American War of Independence. While I wait a large order of figures from Old Glory, might as well build some period specific terrain, so the table matches the figures. Luckily I have a head start with a handful of buildings, really more ACW era but they will do in a pinch. Really sell the frontier vibe, I need to get log cabinets it’s appropriate fencing. Also luckily, I saved all of the matches from the matchbooks used to build this:
Trimming off the strike-end of these matches provides hundreds of square planks of generally uniform thickness and length. Sure, you get a few bent planks now and then, but you’re odds are still way better than when you shop for 2x4s at Home Depot! As an added bonus, the relative thickness of this lumber will help the pieces stand up to years of play and rough storage.
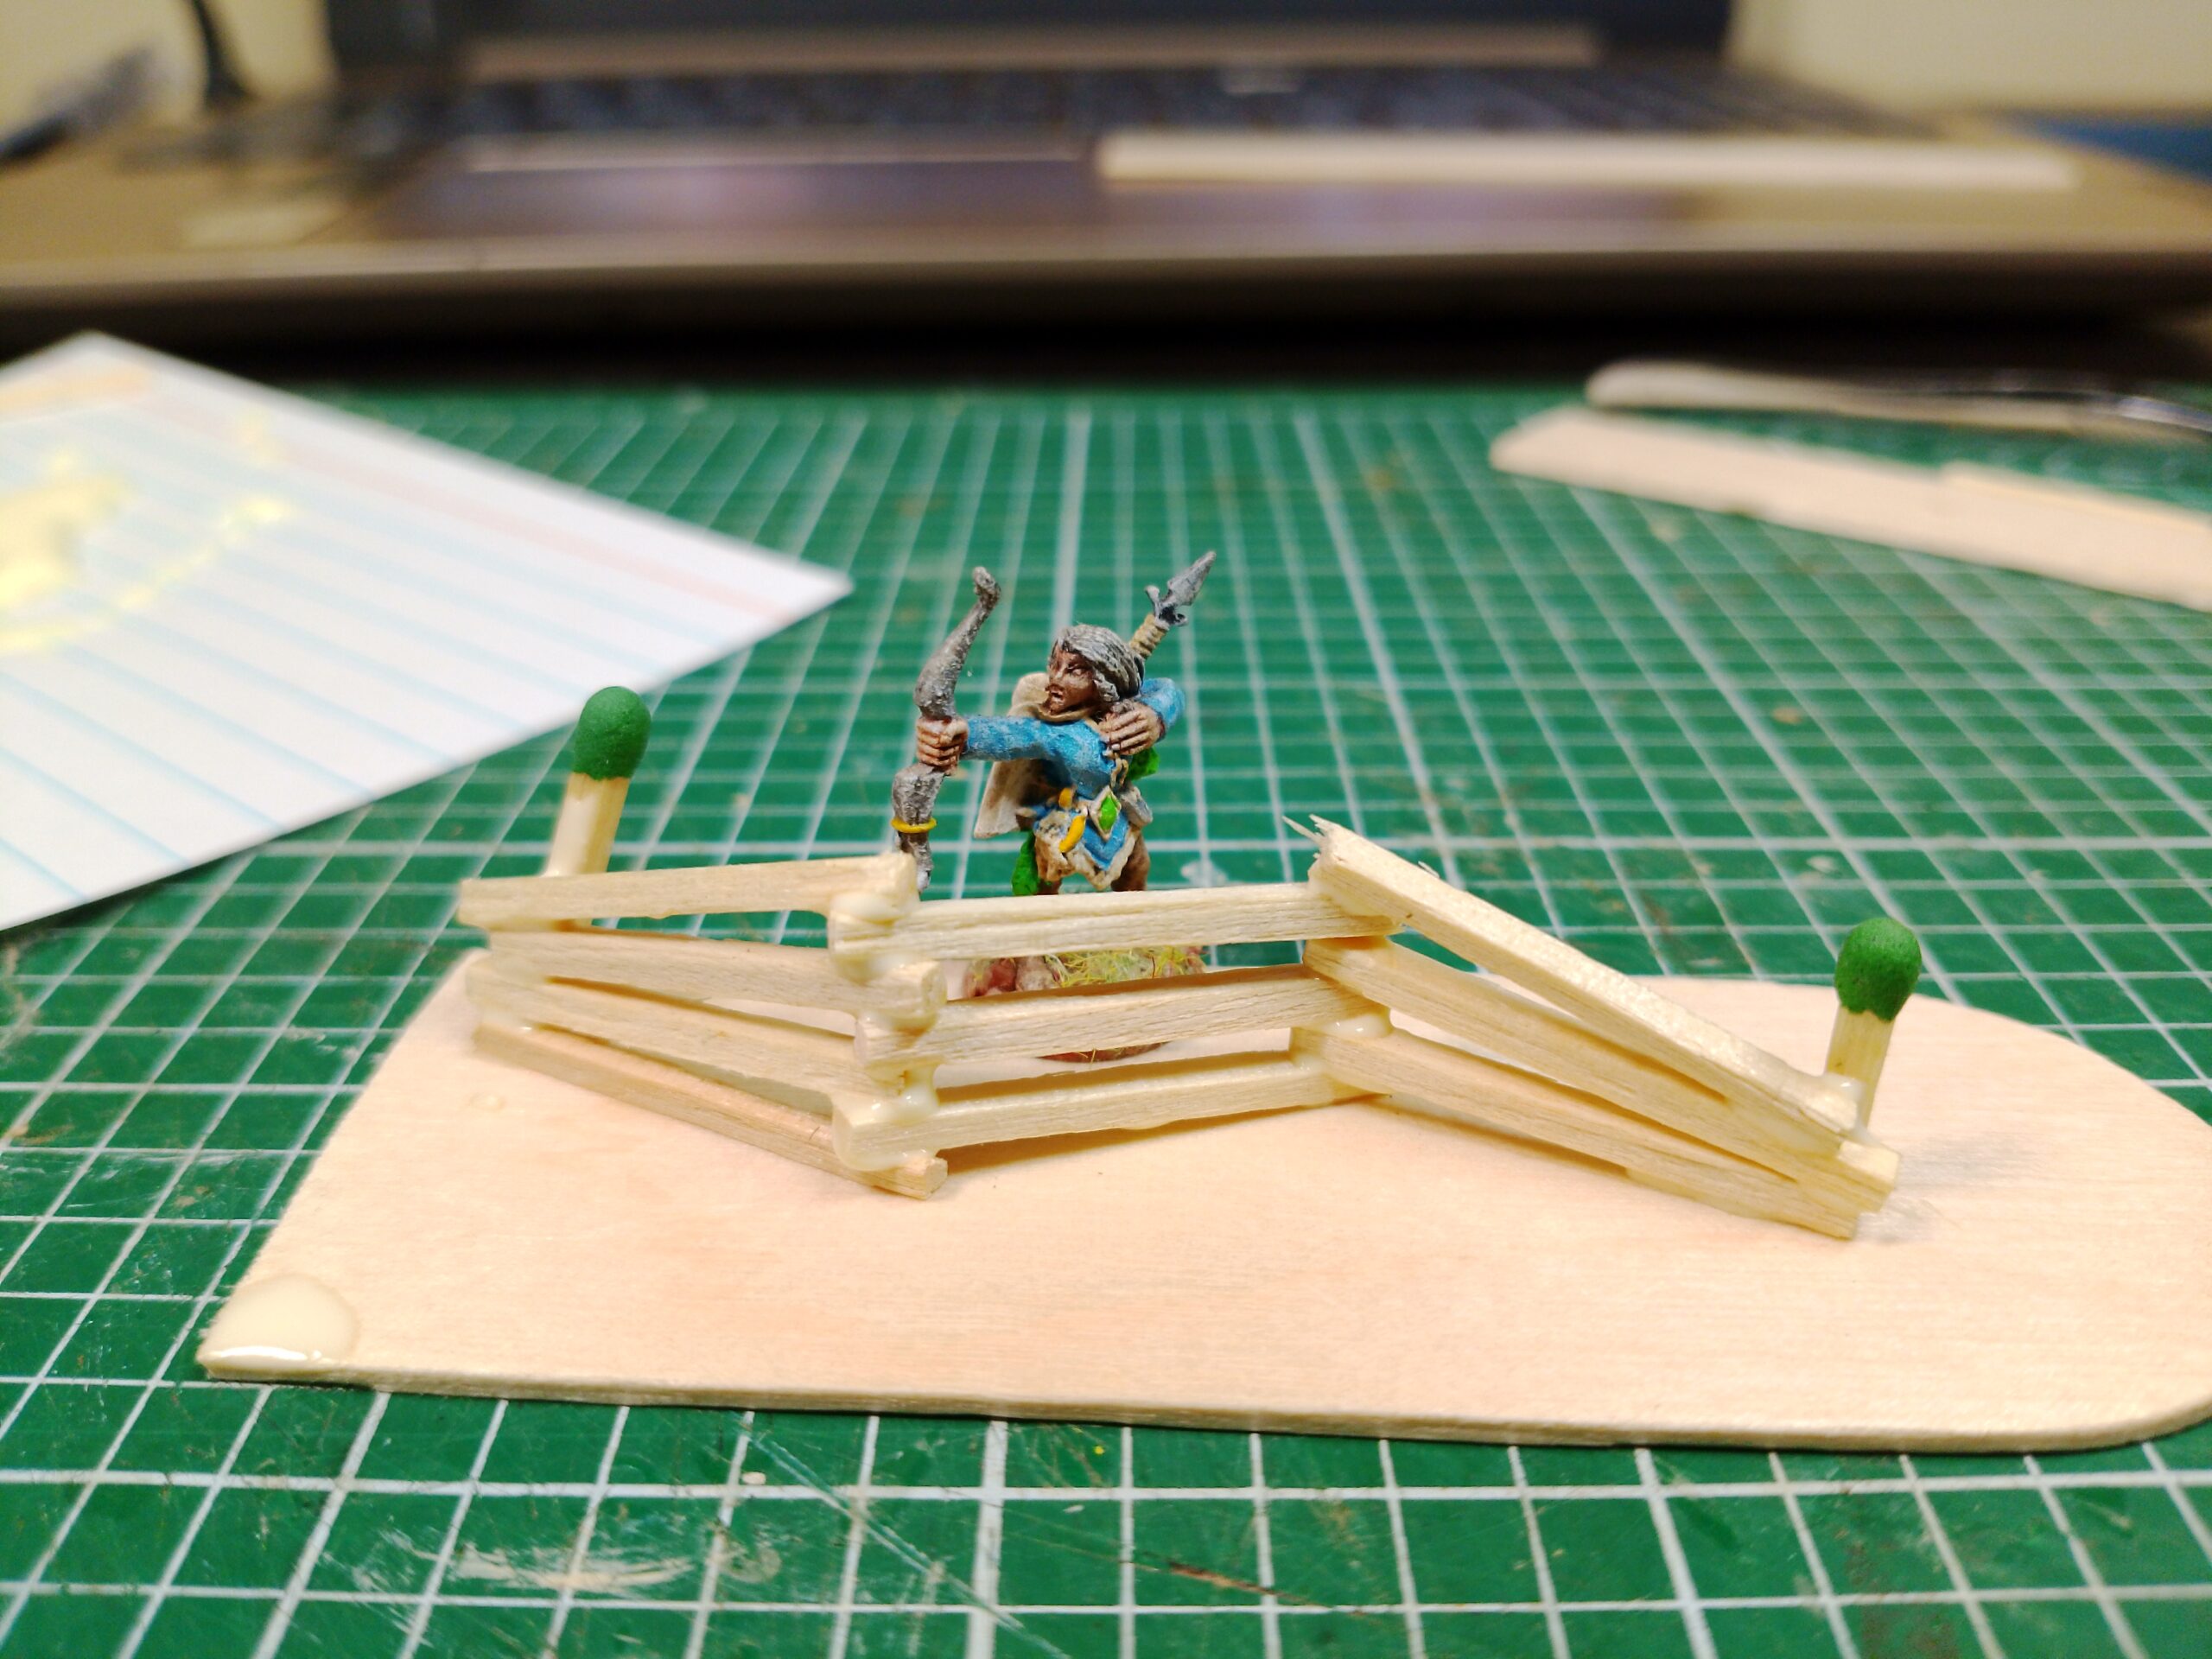
This time around I actually built a small test piece (see above with a 15mm fantasy elf for scale). I don’t usually build one of these, but knowing how thick the matchsticks are compared to my figures never having built a snake rail thanks for, I felt it prudent. Will the matchsticks, in scale they’re probably 6x6s, look too thick? How many rails does each length of fence need? Do I need to mount them on rocks, as is done in the real world to prevent rotting?
The results were mixed, as you can see from preview request to top of this post. Three or four rails, both look okay. Alternating between three and four looks off to my eye, so this tells me to use just three rails. The diagonal ends of the fence are historically accurate, but this piece tells me that joining fence lengths to make a longer straight run is going to look really strange, so I want to make sure the ends of my fence stretches are vertical. This little piece saved me a whole lot trouble, and you can see it in the end result.
This does necessitate the use of small blocks that either end of my fence line, to keep them up right. The test piece also told me not to worry about the historicity of laying the bottom plank directly onto the popsicle stick base. For one thing, that matchstick provides an extra cross brace of stability for the popsicle stick prevent it from warping. For another thing at this scale, losing the slight angle doesn’t really matter.
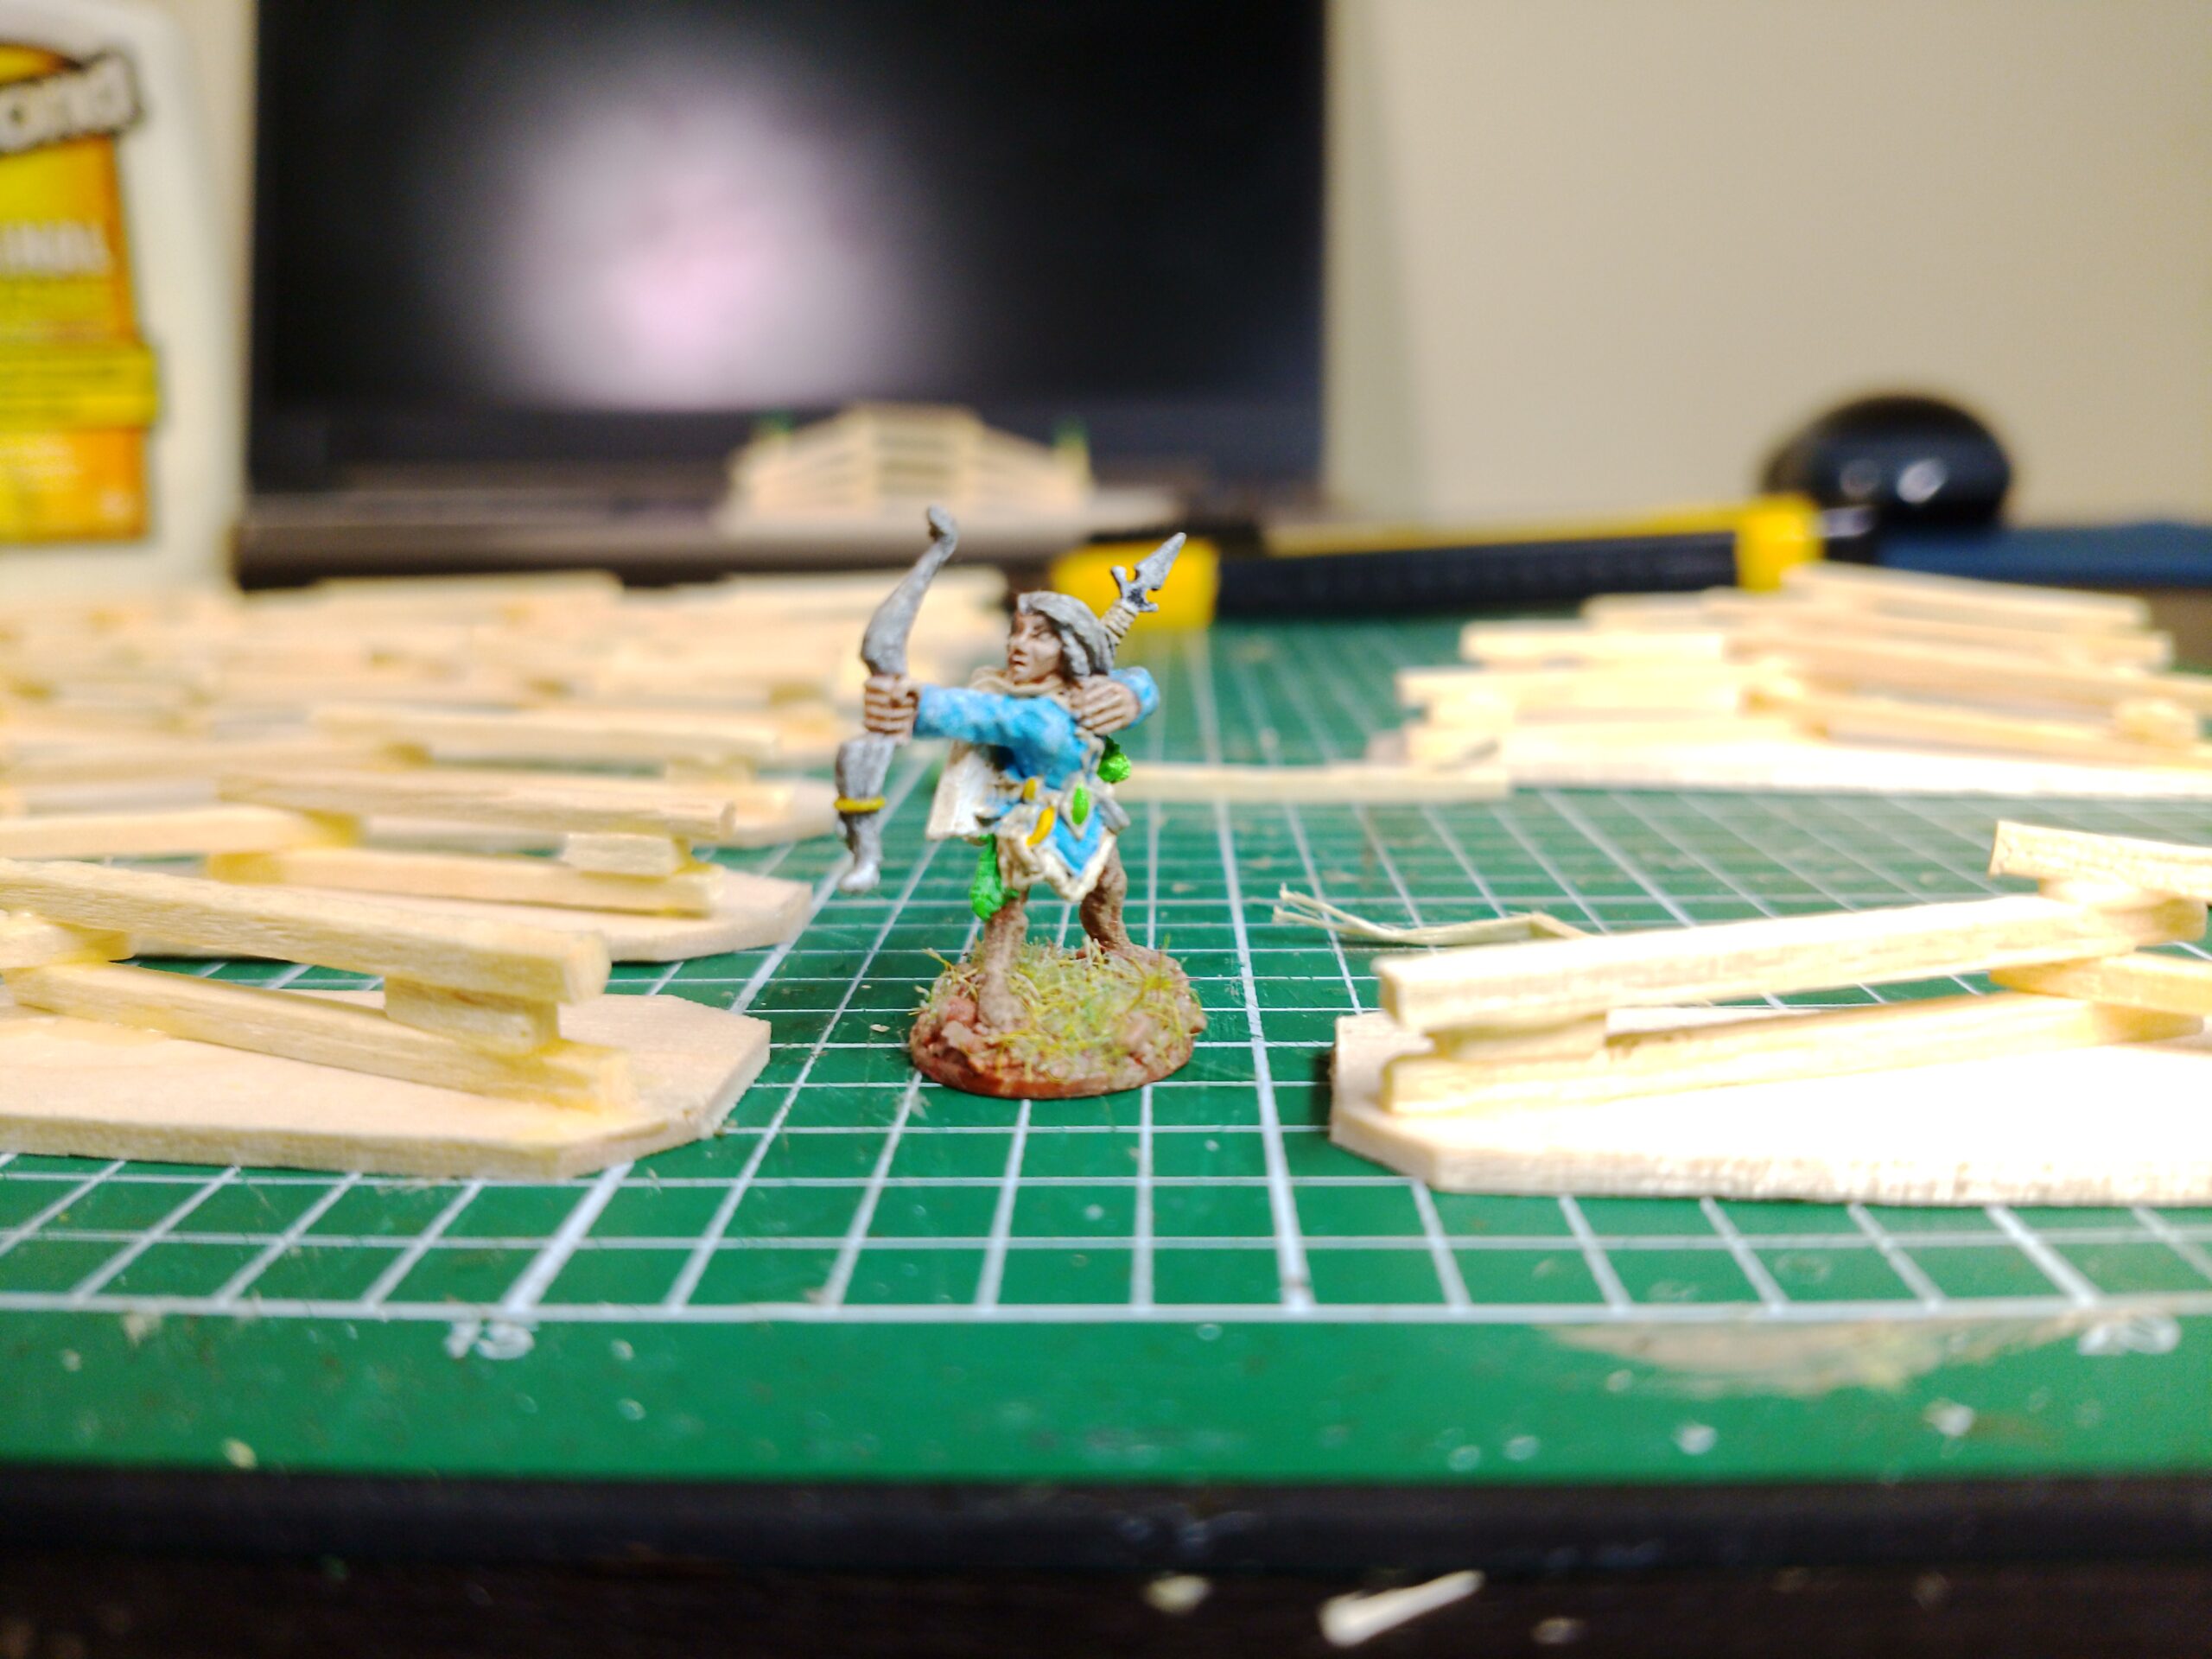
It then became a simple matter of gluing them down, one layer at a time. I used wood glue for added adhesion, but regular PVA craft glue should work just as well. The lengths of the matches dictated the width of my terrain base. Each stick is about 1.3 inches long, and using five of them means you have to play around with how much zig and zag the fence ends up with – just like in the real world.
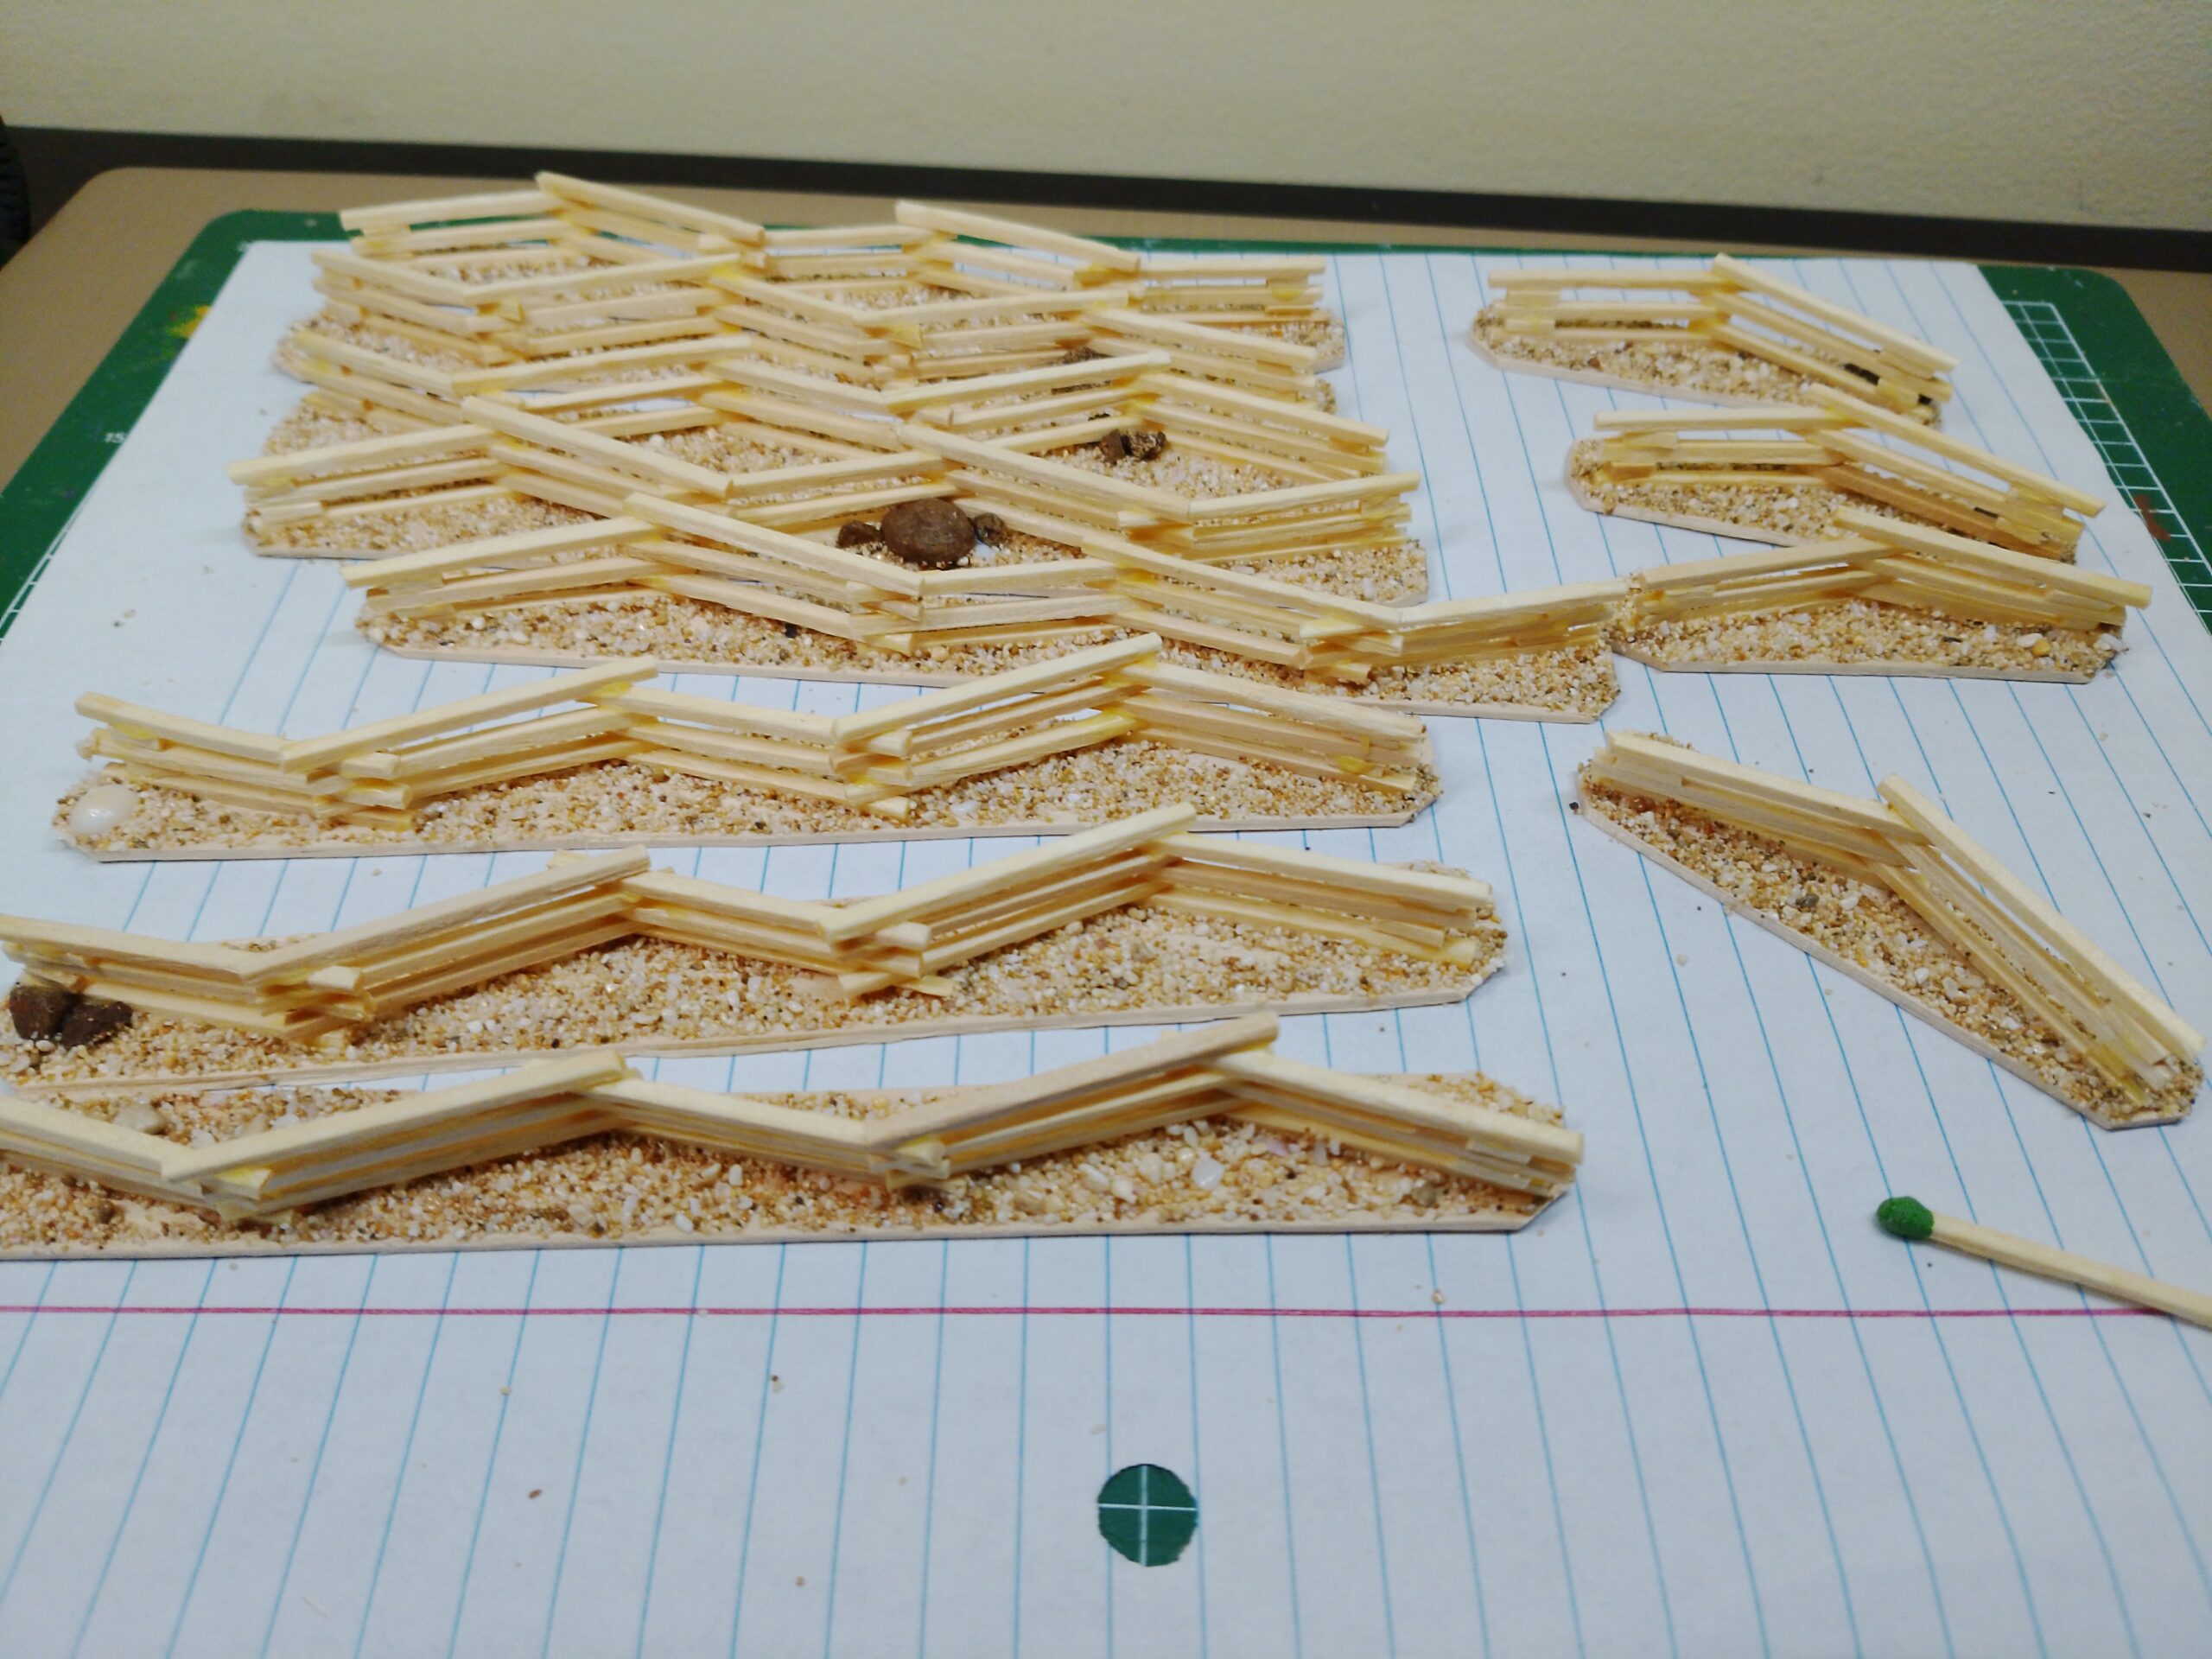
The longer lengths are about six inches and the shorter about 2.5 inches. The short lengths are very lightweight, and drift across the paper under even a slight breeze. Hopefully, in daily use, the added weight of the sand and the extra fiction provided by the felt ground cover will compensate.
Normally, I paint all wood in browns and beiges, as a signal to the eye. This time, I went with a more realistic faded gray for the lumber. This gives it a Sun bleached appearance and helps contrast it with the earth tones of the base.

The last step, after a painted on flat varnish, is the grass and bushes.
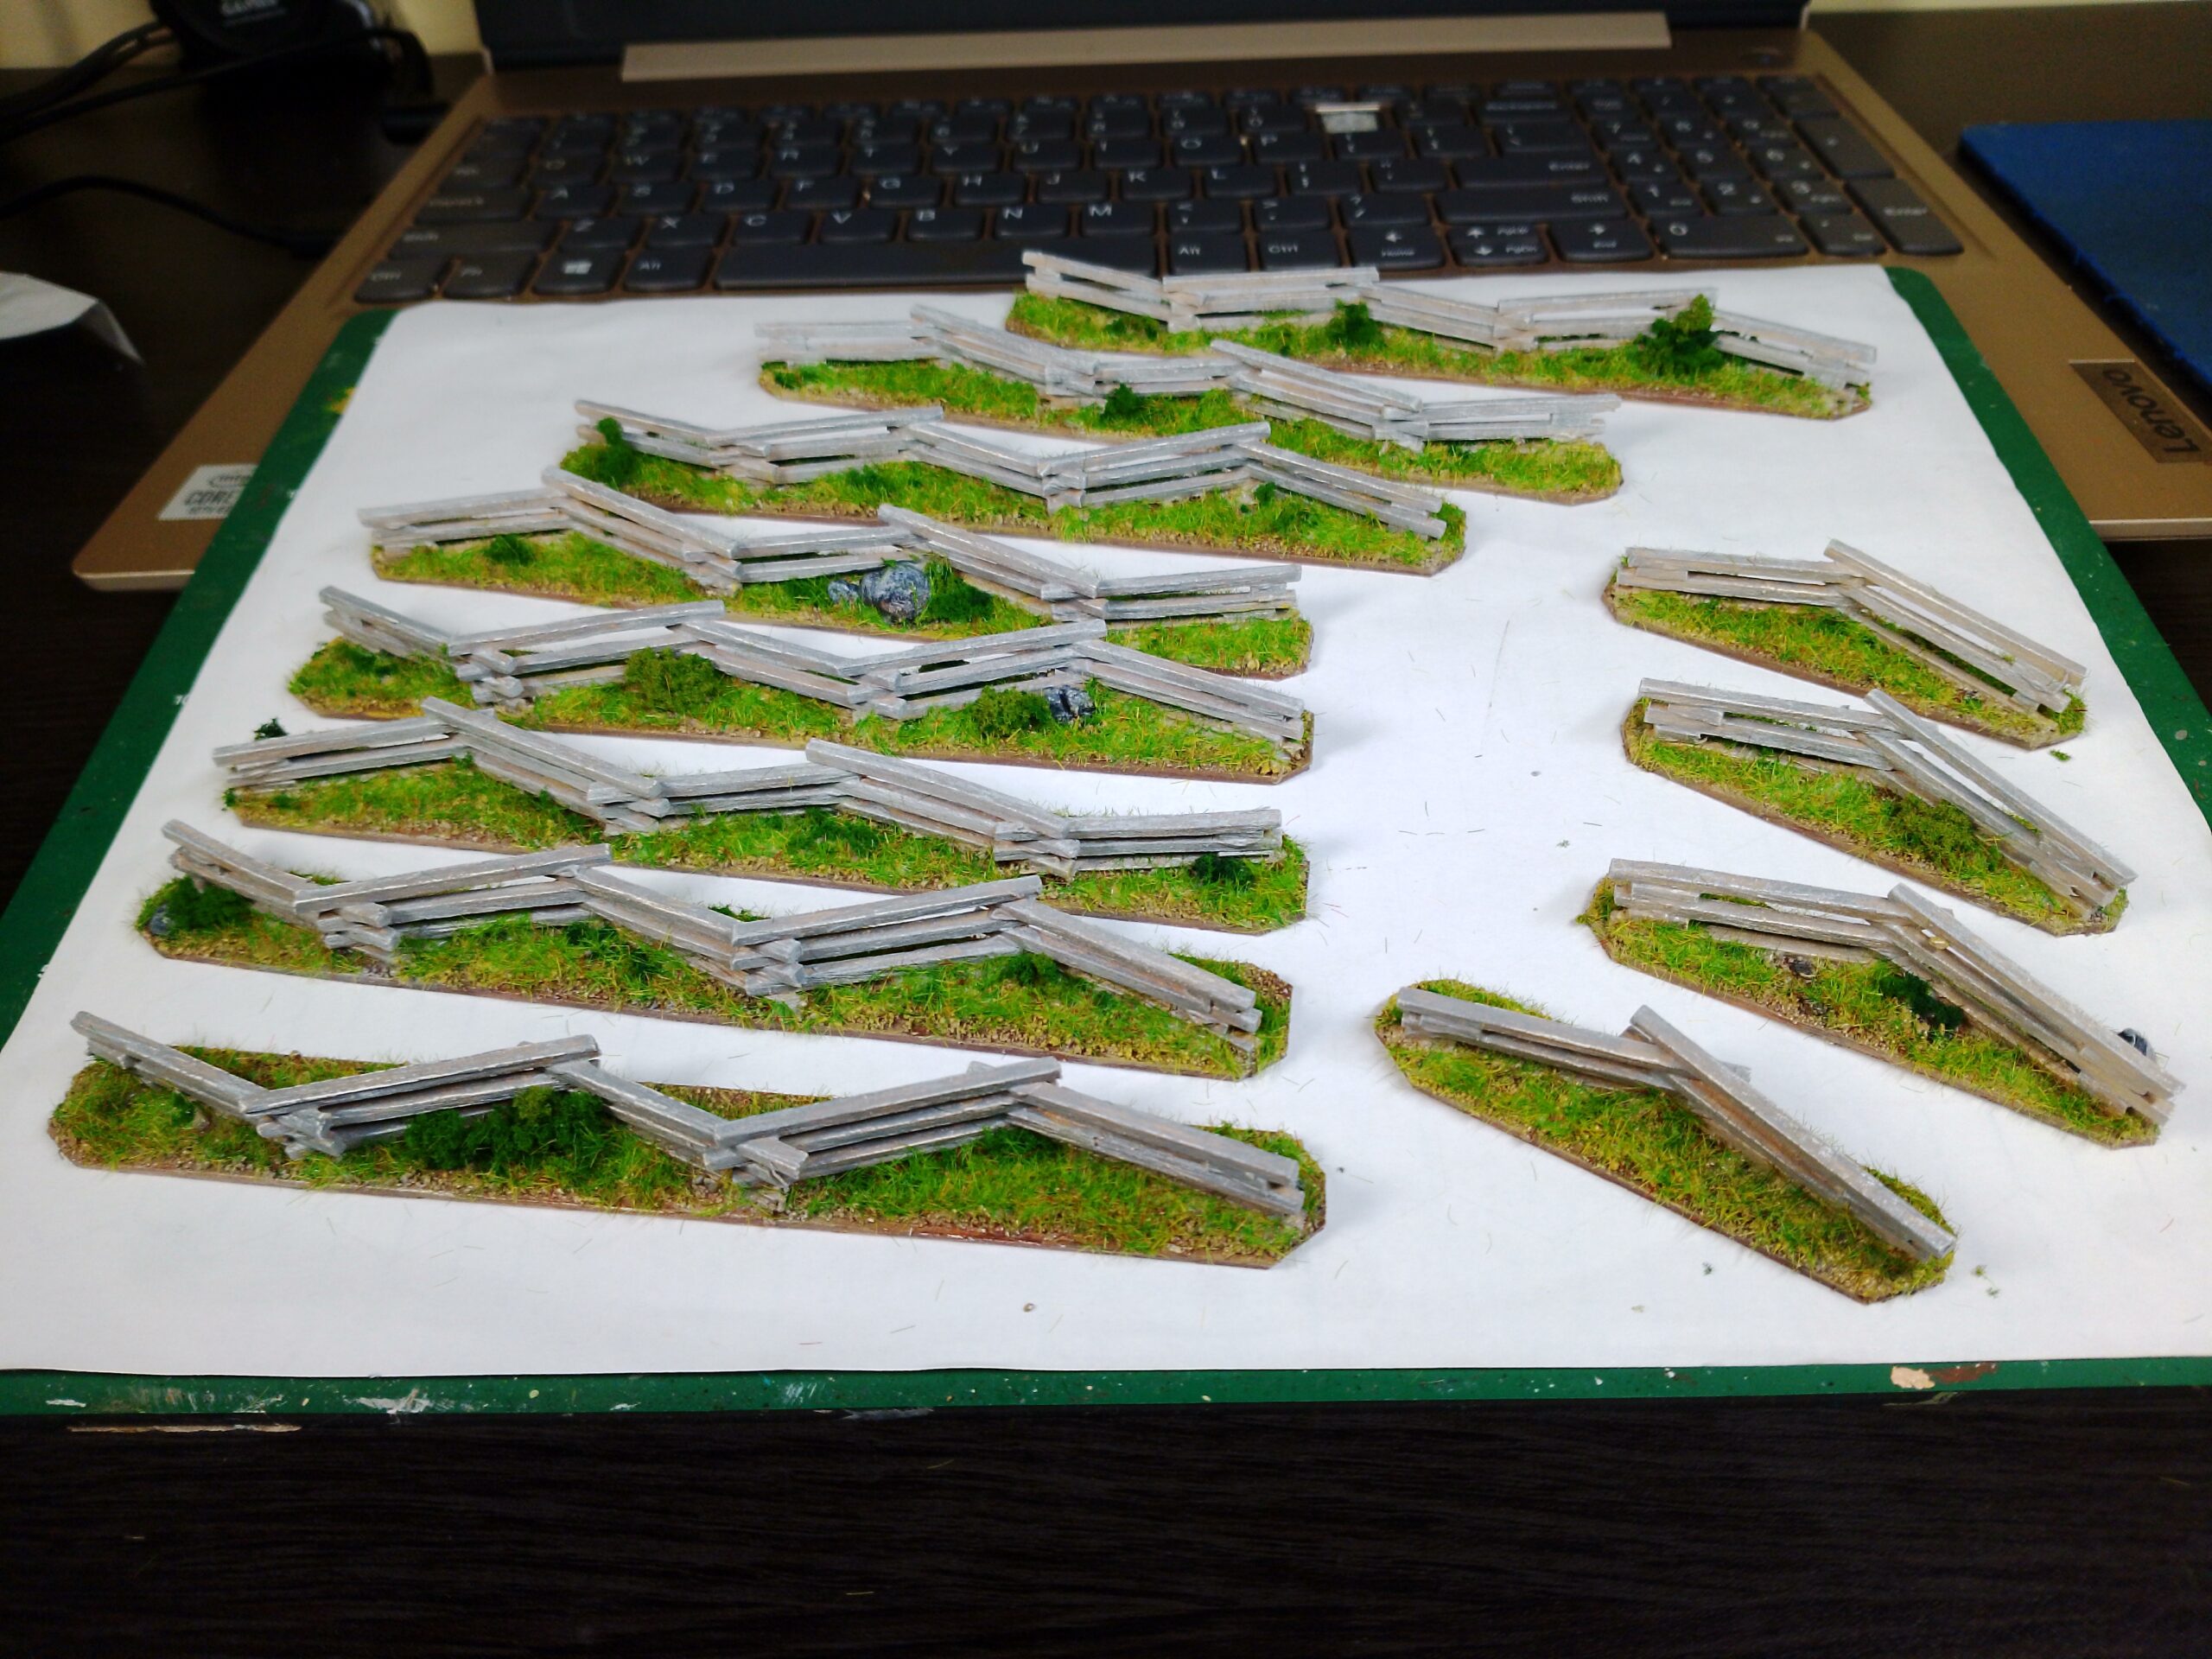
And that’s nearly 5 ft of snake rail fence, complete and in about five 1-hour sessions.